

Lawn Overseeding: Plant Now for a Lush Spring Lawn

Your fall lawn’s secret weapon? Dormant seeding! If your lawn is looking a little thin, patchy, or tired after a long season, now is the perfect time to give it a boost — even though everything looks like it's shutting down for winter.
Dormant Overseeding — a smart and simple way to get a thicker, greener lawn in the spring without doing the heavy lifting when the snow melts.
Here’s how it works and how to do it right 👇
What is Dormant Overseeding?
Dormant overseeding means spreading grass seed over an already dormant lawn — usually in late fall, after the grass has stopped growing but before the ground freezes solid.
The seed stays “asleep” all winter, nestled into the soil, and then wakes up and germinates naturally in early spring as soil temps rise. It’s like putting down your lawn’s future while it’s resting.
Why Overseed in Late Fall?
✔️ Thickens up patchy or thinning lawns
✔️ Rejuvenates tired turf from summer stress or damage
✔️ Beats spring rush — no fighting muddy conditions or summer heat
✔️ Less competition from weeds compared to spring seeding
✔️ Low effort, high reward — let nature do the work over winter!
How to Dormant Overseed the Right Way
Here’s your step-by-step guide:
1. Time It Right
Aim to overseed:
After your lawn has gone dormant (not actively growing)
Before the ground is completely frozen
This window usually falls in late October to mid-November, depending on your location.
2. Prep the Lawn
To help your seed make the best contact with the soil:
Thatch or aerate before seeding
Remove leaves or heavy debris
Mow your lawn short (but not scalped)
Good seed-to-soil contact is key!
3. Choose the Right Seed
All lawns aren’t created equal! Choose seed blends that match your site:
Sunny areas
Shady lawns
High traffic zones
Drought-tolerant mixes
We carry a variety of grass seed blends to fit YOUR specific lawn needs.
4. Spread the Seed
Use a broadcast or drop spreader for even coverage. Lightly rake or roll the seed into the soil if needed.
5. Fertilize with Purpose
Use a starter fertilizer like Max Lawn Seed Starter Fertilizer to feed the soil and support early root development once germination begins in spring.
Apply right after seeding for best results.
⚠️ Important!
Don’t overseed if you’ve applied a fall weed preventer (pre-emergent herbicide). It will prevent your new grass seed from sprouting in spring!
What We Carry to Help You Succeed
✅ Premium grass seed blends for sun, shade, and everything in between
✅ Max Lawn Seed Starter Fertilizer
✅ Spreaders, rakes, and lawn tools
✅ Friendly advice to help you get it just right
Don’t Wait — Sow the Seeds of Spring Now!
Your future lawn will thank you. Stop in and let us help you pick the right seed and fertilizer combo to wake up your lawn looking its best in the spring. It’s an easy, affordable step that delivers lush results.
Putting Your Garden to Bed for the Winter

As October winds down and frost begins to nip at the edges of your garden, it's time to tuck everything in for its long winter nap. Putting your garden to bed might not sound glamorous, but it’s one of the most important things you can do to ensure a strong, healthy start come spring.
Here’s your go-to guide for your fall garden shutdown—plus a few tools and tips to make the job easier.
Water Well Until the Ground Freezes
Just because temperatures are dropping doesn’t mean your plants don’t need water. In fact, deep watering before the ground freezes helps hydrate roots and gives your shrubs, perennials, and trees a stronger chance of surviving winter stress.
✅ Tip: Focus on new plantings, evergreens, and anything you added this season. Moisture helps insulate roots and prevents winter desiccation.
Trim Back Once Dormant
When your perennials and shrubs go fully dormant, it’s safe to give them a little haircut. Cut back dead or damaged stems to prevent disease and tidy things up for next season.
Some plants prefer to be left standing (like ornamental grasses and certain pollinator-friendly varieties), so if in doubt—ask us!
Tools that help: We carry quality pruners and rakes to make cleanup quick and efficient.
Clean Up Debris to Prevent Pests
Fallen leaves and spent plants may look innocent, but they can harbor insects, mold, and disease over winter.
Be sure to:
Rake out dead leaves from garden beds
Remove annuals and any diseased plant material
Tidy up around the base of shrubs and trees
✅ Bonus: Healthy leaves (not diseased) can be added to your compost pile or shredded and used as winter mulch.
Don’t Forget to Mulch!
Some plants need a little extra TLC to get through the coldest nights—especially temperamental or borderline-hardy plants like Japanese maples.
Add a 2–4” layer of mulch around:
Japanese maples
Roses
Newly planted perennials or shrubs
Any marginally hardy plants
This acts like a cozy blanket, helping regulate soil temperature and moisture.
Need mulch? We've got you covered—with bulk and bagged mulch ready to go!
Cover Crops: The Garden’s Secret Weapon
One of the best ways to replenish nutrients and protect your soil over winter is by planting a cover crop! Popular cover crops include:
Winter rye
Crimson clover
Hairy vetch
They prevent erosion, suppress weeds, and improve soil structure for better spring planting. You can even mow and till them into the soil as a green fertilizer next season.
Never tried cover cropping before? Stop in—we’ll help you choose the right mix for your garden.
Compost: Fall is the New Spring
Now is a great time to top-dress vegetable gardens and raised beds with compost. A light layer worked into the top few inches will slowly break down over winter, boosting soil health by spring.
You can also add compost to perennial beds, around shrubs, or as a base layer before mulching.
We carry high-quality bulk and bagged compost perfect for garden and landscape use.
Fall Garden Wrap-Up Checklist
✅ Water deeply until the ground freezes
✅ Cut back perennials and shrubs once dormant
✅ Clear debris and fallen leaves
✅ Mulch sensitive plants
✅ Top-dress with compost
✅ Plant cover crops in veggie beds
✅ Rest, relax, and dream of spring
Need Supplies? We’ve Got You Covered.
Stop in for everything you need to wrap up your garden this fall, including:
Mulch & compost (bulk and bagged)
Hand tools: pruners, loppers, rakes, gloves
Cover crop seeds
Fall garden advice (we love questions!)

Bringing Your Houseplants Back Indoors: How to Help Them Thrive All Winter Long

As the temperatures drop and outdoor days grow shorter, it’s time to give your houseplants a warm welcome back inside! Whether you’re a seasoned plant parent or just starting your indoor jungle, this quick guide will help you transition your plants safely and keep them happy all winter long.
Step 1: Inspect and Clean Before Moving In
Before any plant crosses your threshold, give it a good once-over. Look under leaves, along stems, and even in the soil for sneaky hitchhikers like aphids, fungus gnats, or spider mites. Outdoor plants can pick up tiny pests that thrive indoors once the heat turns on.
Pro Tip: A gentle rinse with lukewarm water with the hose or in your shower is a great start, but if you spot pests or residue, reach for Neem Max, Insecticidal Soap, or Captain Jack’s Dead Bug Brew. These natural, plant-safe options help you manage unwanted visitors without harsh chemicals.
For extra cleanliness, wipe leaves with a damp cloth — removing dust and debris allows your plants to photosynthesize more efficiently once they’re inside under lower light conditions.
Step 2: Check for Sunlight and Space
Your plants were spoiled by outdoor sunshine, so light changes will take some adjusting. Place sun-loving plants near south- or west-facing windows, and move shade lovers to spots with filtered light.
If natural light is scarce, supplement with grow lights — modern full-spectrum bulbs mimic sunlight beautifully and keep foliage lush through dark winter days.
Step 3: Reevaluate Watering
Indoor humidity is much lower in the colder months, and plants won’t dry out as quickly. Overwatering is one of the biggest winter mistakes!
Let the top inch or two of soil dry between waterings. For succulents and cacti, you might only need to water once a month. If you’re unsure, a moisture meter is a foolproof way to check before you pour.
Step 4: Feed and Refresh the Soil
As your plants move indoors, give their soil a nutrient boost. Mix in a bit of Sustane Flourish fertilizer to improve soil structure and encourage strong root health.
Quick tip: Don’t fertilize too heavily in winter — plants grow slower with less light. A light feeding every 6–8 weeks is plenty until spring.
Step 5: Prevent Pests Proactively
Even after cleaning, pests can emerge once the warmth of your home wakes them up. Keep a small bottle of Neem Max or Insecticidal Soap on hand. A monthly preventative treatment keeps most common pests at bay.
You can also place yellow sticky traps near your plants — they help monitor fungus gnat activity before it becomes a problem.
Step 6: Acclimate Gradually
If your plants have been outside for a while, bring them in for a few hours at a time over a few days before making the move permanent. The gradual change helps them adjust to lower humidity and temperature differences.
For tropical plants, grouping them together indoors can create a mini microclimate with more humidity. Adding a humidifier nearby can also help mimic their outdoor environment.
Final Touch: TLC and Observation
The first few weeks indoors are an adjustment period. Expect a little leaf drop — that’s normal! Keep an eye out for signs of stress, such as yellowing or drooping leaves, and adjust light or water as needed.
A Little Love Goes a Long Way! Bringing plants indoors isn’t just about survival — it’s about setting them up for a cozy, healthy season. With a little care, the right products, and regular attention, your plants will thank you by staying vibrant all winter long — and be ready to flourish again next spring
Find all the products discussed in this blog post in our Garden Shop or in our Plant Health Department, up by the registers.

It’s Garlic Planting Time!
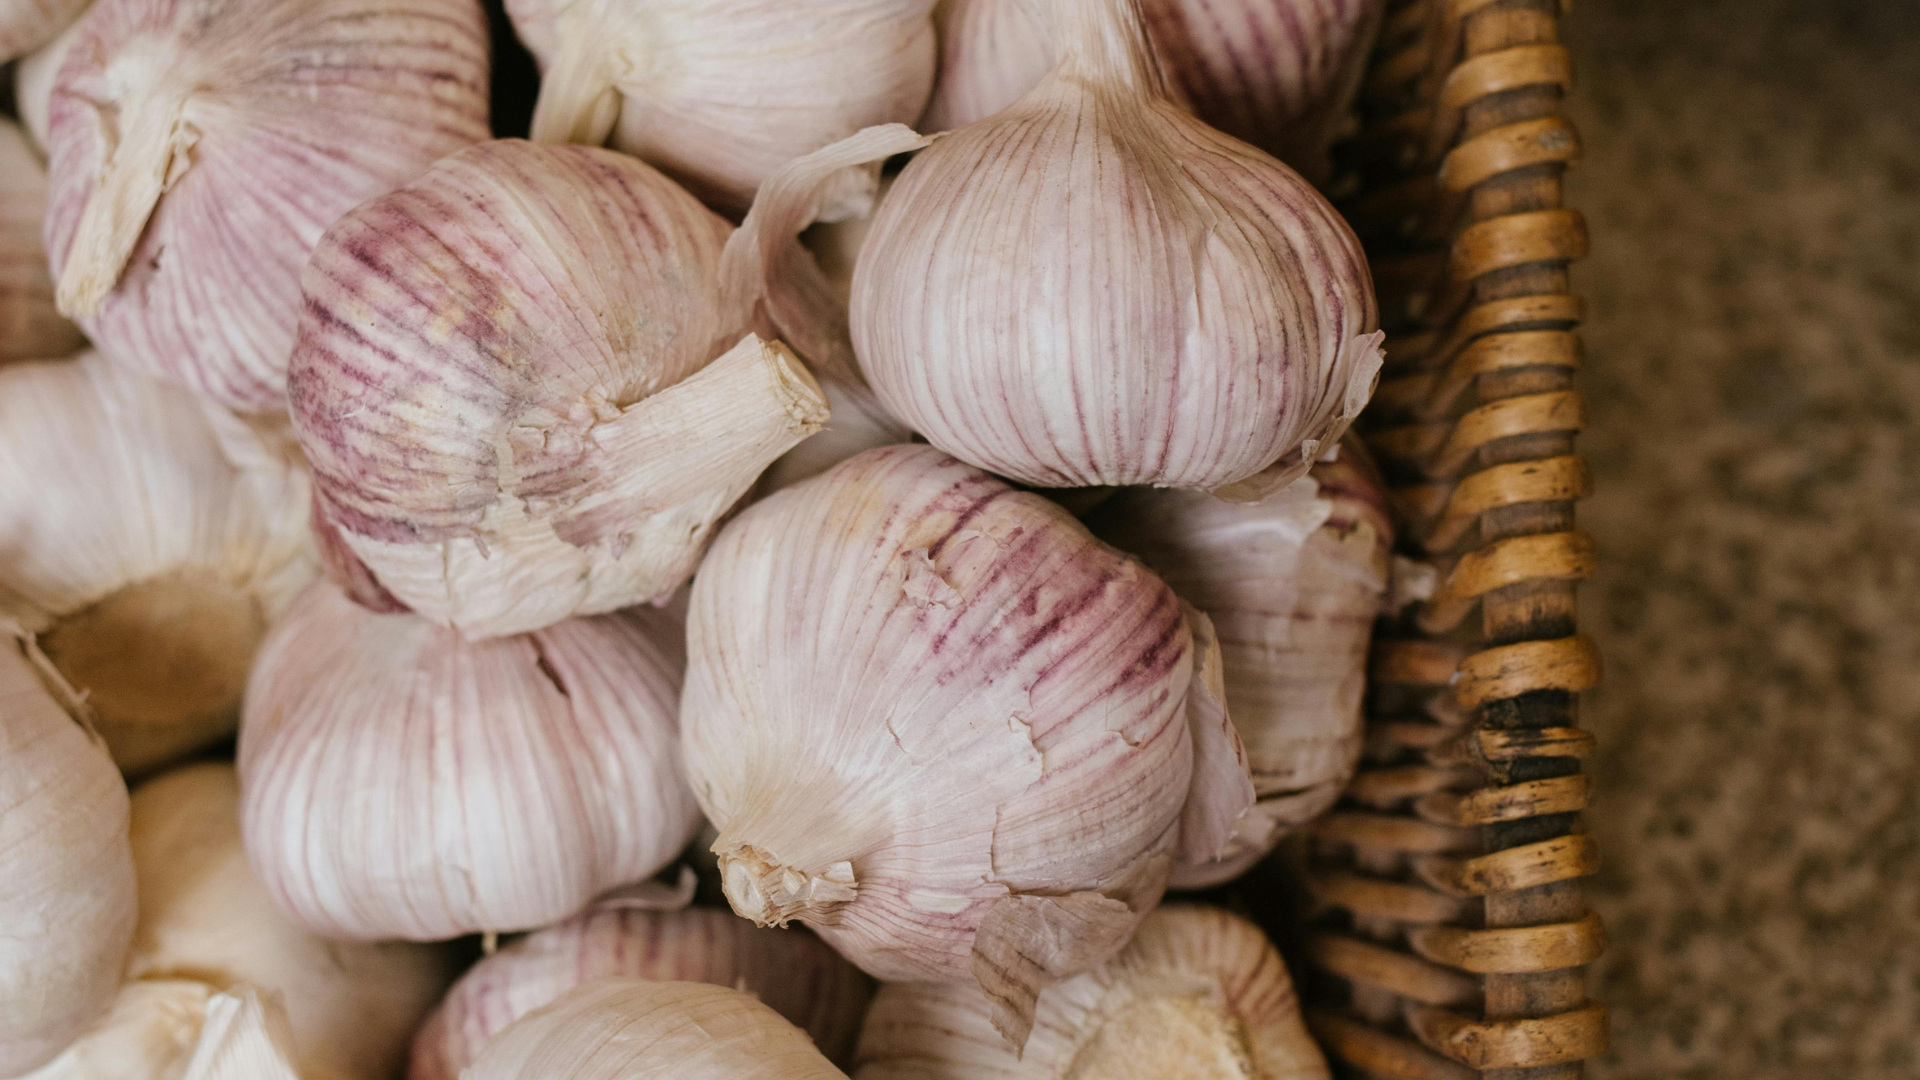
With the changing of seasons, it’s time to start your fall bulb planting! One of our favorites? Garlic! With all of its amazing health benefits and uses, it’s a must-have in every garden. Fall planting gives garlic the cold period it needs to develop strong roots, setting you up for a plentiful summer harvest. Plus, nothing beats the flavor of homegrown garlic in your favorite recipes! Check out a few fun facts and helpful tips about your garlic planting below:
Garlic is Planted in the Fall
Garlic is one of the few crops you plant in autumn, usually 4–6 weeks before the ground freezes.
It needs cold weather to develop strong roots before going dormant in winter.
One Bulb = Many Cloves = Many Plants
Each clove of garlic can grow into a full bulb.
Planting one bulb’s worth of cloves can give you 6–12 new bulbs at harvest!
Planting Depth & Spacing
Cloves should be planted about 2 inches deep and 4–6 inches apart.
Pointy side up — that’s where the sprout emerges.
Cold Weather is Essential
Garlic actually needs cold (“vernalization”) to split into cloves.
If you plant in spring, you’ll usually get just one big round clove instead of a full bulb.
Scapes are a Bonus Treat
In spring, hardneck garlic varieties produce curly flower stalks called scapes.
They’re edible and taste like garlicky asparagus — a gourmet delicacy!
Long Growing Season
Garlic takes 8–9 months to mature — like a “pregnancy” in the garden.
Harvest typically happens in mid-summer, when half the leaves have browned.
✨ Fun gardener’s tip: Garlic not only tastes great, it also repels pests like aphids and Japanese beetles when planted near other crops.
How to Plant Your Garlic:
1. Choose & Prepare Garlic
Select healthy, firm bulbs (find the perfect variety in our Garden Shop!)
Break apart the bulb into individual cloves just before planting.
Keep the papery skin on each clove — it protects them.
2. Prep the Soil
Garlic likes loose, well-draining soil with plenty of organic matter.
Add compost (like Purple Cow or similar) to improve structure and nutrients.
Aim for a soil pH between 6.0–7.0.
3. Plant the Cloves
Plant in fall (4–6 weeks before the ground freezes).
Place each clove pointy end up, about 2 inches deep.
Space cloves 4–6 inches apart, in rows about 12 inches apart.
4. Water & Mulch
Water well right after planting.
Add a thick layer of mulch (straw, shredded leaves, or compost) to insulate over winter.
5. Overwinter Care
Garlic roots will grow in fall, but tops stay small.
In spring, green shoots will emerge through the mulch.
6. Growing Season
Water regularly in spring and early summer.
Keep the bed weed-free (garlic doesn’t like competition).
Snap off scapes (flower stalks) when they appear — this directs energy to the bulb.
7. Harvest
Garlic is ready in mid-summer when about half the leaves have turned brown.
Loosen the soil gently and pull bulbs out.
Cure (dry) bulbs in a shaded, airy spot for 2–3 weeks before storing.
✨ Pro Tip: Rotate garlic beds each year — don’t plant in the same spot more than once every 3–4 years to prevent soil disease.
Ready to get started? Find all your garlic planting supplies and bulbs in our Garden Shop today!

Cozy & Delicious: Squash Recipes to Celebrate Fall
Fall is the perfect time to bring the warmth of the season into your kitchen. While squash may look charming stacked on your porch or table, they’re so much more than just cute decorations. These versatile vegetables shine in the kitchen—whether roasted, baked, or blended into soups. Stop by the garden center to grab your favorite varieties, then head home and let the cozy aromas fill your house. These recipes will show you just how easy (and delicious!) it can be to turn fresh-picked squash into comfort food worth savoring.


Plant Now, Bloom Later: Fall Bulb Planting Made Easy
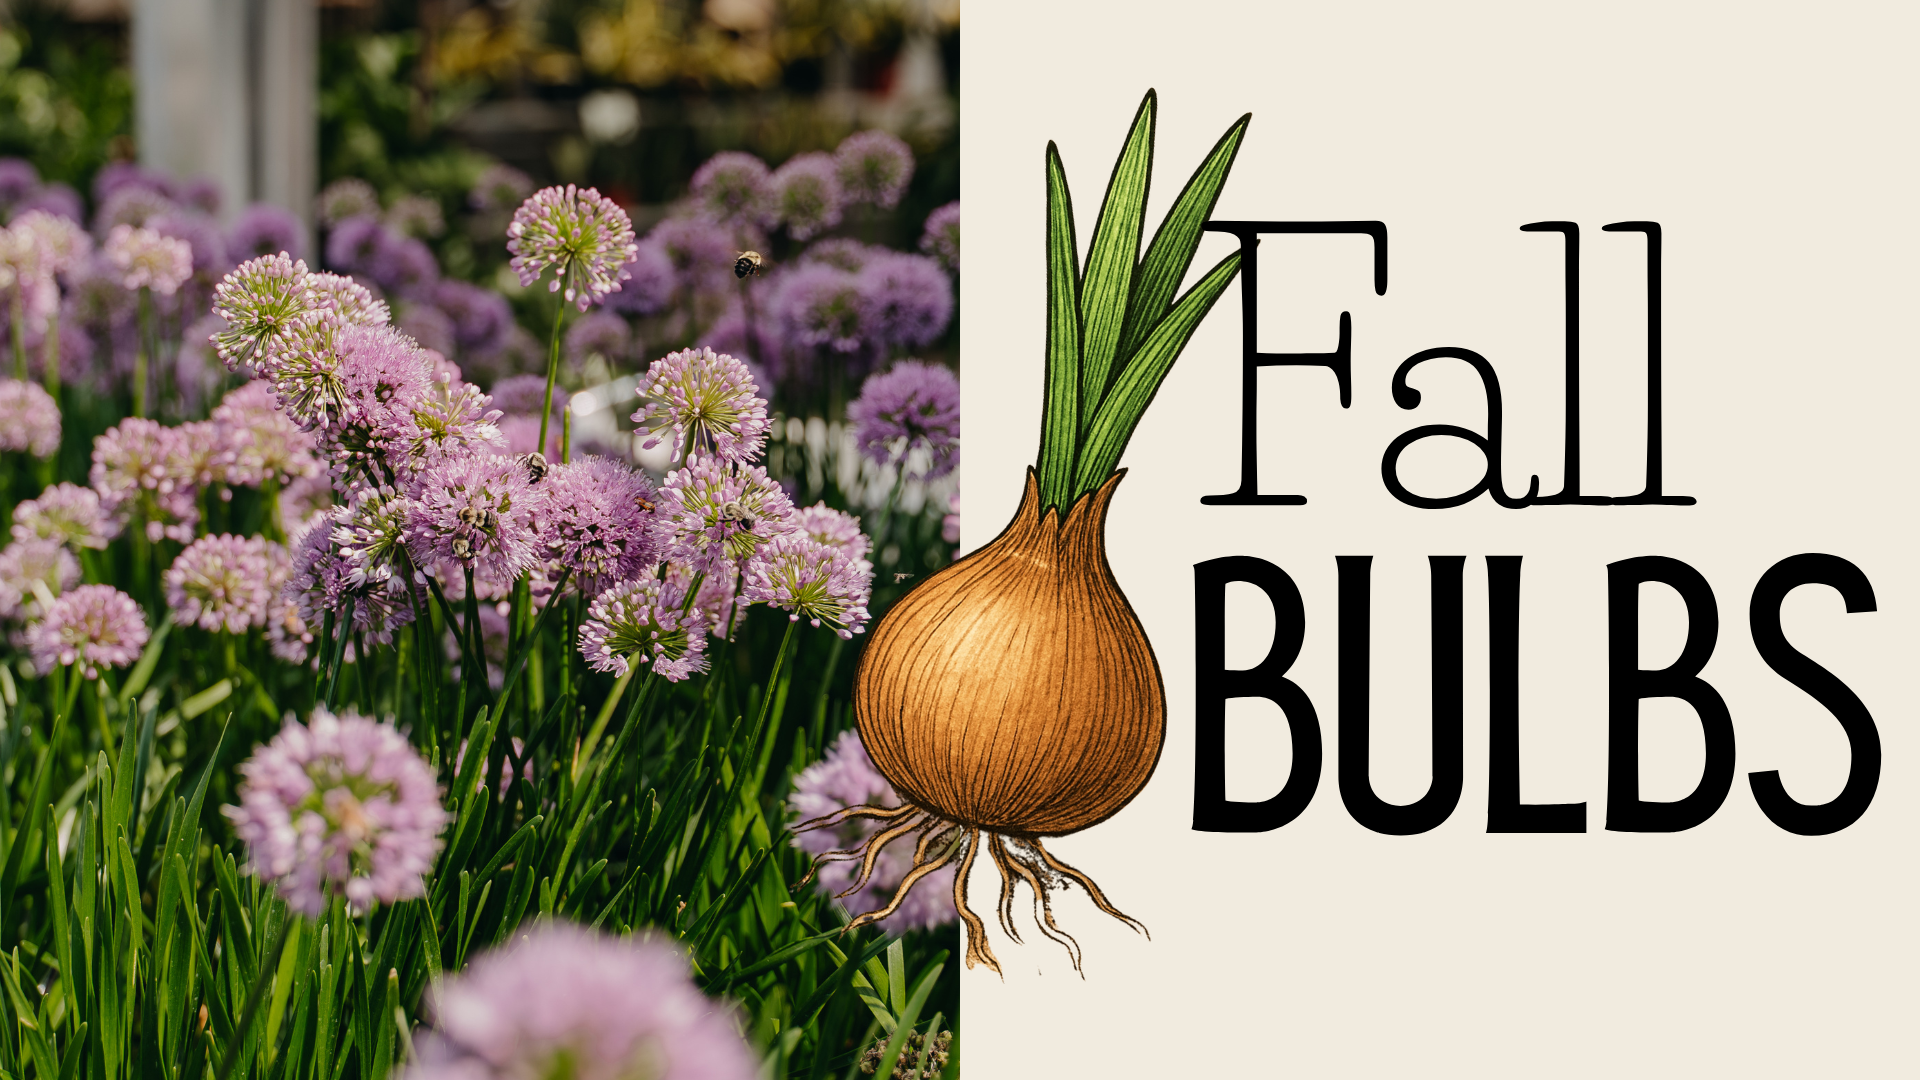
There’s something magical about planting bulbs in fall—you tuck them into the soil just as the leaves crunch underfoot, then months later, they burst into color when spring rolls around. Think of it as gardening’s version of a time capsule: you plant now, and your future self gets to enjoy the rewards!
At Down to Earth, we’ve stocked up on some of the best bulbs for Wisconsin gardeners, plus everything you need to get them planted right.
Why Plant Bulbs in Fall?
Perfect Timing – The cool soil of fall helps bulbs establish strong roots before winter sets in.
Spring Rewards – A little effort now means early blooms that chase away the winter blues.
Diverse Payoff – From flowers to food, bulbs bring both beauty and bounty.
What’s in Stock This Season
Tulips 🌷 – A spring classic! Plant a mix of colors for a cheerful, show-stopping display.
Daffodils 🌼 – Bright, sunny blooms that return year after year—low-maintenance and deer-resistant.
Garlic 🧄 – Plant cloves now for flavorful, homegrown garlic next summer.
Allium 🌸 – Striking globe-like flowers that add architectural interest to any bed.
Crocus 🌼 – One of the very first to bloom in spring—tiny but mighty color when you need it most.
Quick Planting Tips
Location, Location, Location – Choose a sunny to lightly shaded spot with well-drained soil.
Planting Depth – A good rule of thumb: plant bulbs about 2–3 times as deep as they are tall.
Pointy Side Up – For bulbs with a visible tip, that’s where the stem will sprout.
Water In – Give your bulbs a good drink after planting to help them settle in.
Mark Your Spot – Use plant tags or a garden map so you don’t accidentally dig them up in spring.
Don’t Forget Supplies!
We’ve got:
Bulb planters for easy digging
Bone meal & bulb fertilizer for healthy growth
Mulch to keep bulbs insulated over winter
Final Thought
Planting bulbs in fall is the ultimate act of garden optimism. Whether it’s the flavor of homegrown garlic or the first cheerful crocus breaking through snow, the payoff is always worth it. Stop by Down to Earth to stock up on tulips, daffodils, garlic, allium, crocus, and all the tools you need to make next spring spectacular.

Planting for Fall Color: Why Fall is the Perfect Time to Plant

When you think of planting, spring may come to mind first—but did you know fall is actually one of the best seasons to get plants in the ground? Cooler weather, steady moisture, and reduced stress on plants all make autumn a gardener’s secret weapon. Whether you’re refreshing your landscape or starting something brand new, planting now sets you up for success next year.
Why Fall is the Time to Plant
Cooler Temperatures = Less Stress
Plants don’t have to battle summer heat. Instead, they can focus on establishing strong roots before winter.Perfect Root Growth Window
Soil stays warm even as air temperatures drop, giving roots the ideal conditions to spread and anchor.Moisture Works in Your Favor
Fall rains help keep soil evenly moist—no constant watering required.Head Start for Spring
Plants installed in fall wake up strong and vigorous in spring, already settled into their new home.
Top Picks for Fall Color
Adding color now not only brightens your yard today but also ensures year-round beauty. Here are some top choices for fall color across all categories:
Perennials
Coneflowers (Echinacea): Late blooms in purple, pink, and white; attract pollinators.
Black-Eyed Susan (Rudbeckia): Bold yellow flowers that thrive into fall.
Sedum ‘Autumn Joy’: Succulent foliage with rose-pink flower heads that deepen to burgundy.
Annuals
Fall Mums: A fall classic, available in rich reds, golds, purples, and oranges.
Pansies: Cheerful blooms that withstand cooler temps.
Celosia: Flame-like flowers that add bold texture and vibrant color.
Trees
Maples: Brilliant scarlet, orange, or yellow fall foliage—true showstoppers.
Birches: Golden yellow leaves and attractive bark for winter interest.
Serviceberry: Multi-season beauty—white spring flowers, summer berries, and fiery red fall leaves.
Shrubs
Hydrangeas: Fall brings a shift to warm, antique tones—pinks, bronzes, and greens.
Burning Bush (Euonymus alatus): Famous for its electric red fall display.
Ninebark: Coppery-red foliage adds rich depth all season long.
Let Us Help You Plant for Fall
Don’t have time (or energy) for digging holes and hauling soil? That’s where we come in! Our delivery and planting services take the stress out of landscaping. Simply choose your plants, and we’ll bring them right to your home and install them professionally—so all you have to do is enjoy the beauty.
Fall isn’t just about pumpkin spice and cozy sweaters—it’s the season to set your garden up for long-term success. Plant now for gorgeous fall color today and thriving landscapes tomorrow. Stop in at Down to Earth to explore our wide selection of fall favorites—or let us bring the beauty straight to your doorstep!

How to Care for Your Mums
Because They Need More Than Just a Good Coffee and a Compliment!

‘Tis the season for mums, corn stalks, and pumpkins to be beautifully arranged on your front stoop. Unlike the other elements of your decor, however, mums are living plants that require a bit of attention to maintain their beauty throughout the fall.
Overall, Mums do best with part sun exposure, as sunlight helps speed up their bloom cycle, resulting in vibrant flowers. Here’s our secret to success: if you want your mums to bloom faster, place them in full sun. Conversely, if you wish to slow down the blooming process + extend their lifespan, opt for a shadier location. Don’t forget to deadhead the flowers as needed to encourage continued growth + blooming!
Mums typically require daily watering, with morning being the best time to do so, as this allows them to absorb moisture throughout the day. To promote even growth, water your mums from the base, underneath the foliage. Top-watering can lead to splitting or create a worn watering hole, detracting from their manicured round shape.
And that’s it! Now, sit back and enjoy your annual mums!
While you’re at it, here are some practical fall decorating ideas with your mums:
Slip a fall mum into an empty pot or bushel basket. Need height? Place an upside-down pot under the mum pot to give it a lift!
Group mums with porch pots, pumpkins, straw bales, + corn stalks to create a beautiful fall collection.
Utilize a variety of sizes + colors—there are so many choices!

Stop Grubs Before They Stop Your Lawn

If you’ve noticed brown patches in your lawn or animals digging for a snack, grubs might be the culprit. Grubs are the larval stage of beetles (like Japanese beetles, June beetles, and chafers). While small, these pests can cause big damage by feeding on the roots of your grass, leaving your lawn weak, patchy, and prone to drought stress.
The Grub Life Cycle
Understanding when grubs are most vulnerable is the key to controlling them:
Summer – Adult beetles lay eggs in the soil.
Late summer into fall – Eggs hatch into tiny white grubs that begin feeding on grass roots.
Winter – Grubs burrow deeper to survive the cold.
Spring – They resurface to feed again before turning into adult beetles.
The best time to treat is late summer into early fall, when grubs are young and closest to the surface. This is when products are most effective in breaking the cycle.
Why Treat for Grubs?
Protect your lawn from root damage and unsightly dead patches.
Prevent animal damage from skunks, raccoons, and birds that dig for grubs.
Stop beetles before they emerge, reducing future infestations.
Product Spotlight: Grub Control Solutions
We carry trusted options to fit your lawn care style:

St. Gabriel Milky Spore
100% organic and environmentally friendly
Targets Japanese beetle grubs specifically
A long-term solution that builds up in the soil and can last for years

Bayer Advanced Complete Insect Killer
Broad-spectrum control for grubs and many other insects
Works both above and below ground
Great for homeowners looking for quick, effective results

BioAdvanced Grub Killer Plus
Fast-acting control against grubs at the surface
Protects your lawn for months with a single application
A reliable go-to for stopping active infestations
Set Your Lawn Up for Success
Don’t let grubs steal the beauty and health of your yard. Treating now means stronger roots, greener grass, and fewer beetles in the seasons to come. Stop in today to pick up grub control products that work—and chat with our expert team for advice on the right option for your lawn.

The Magic of Maples

Few trees can rival the breathtaking beauty of maples in autumn. From fiery oranges and deep reds to rich burgundy tones, maples add year-round interest and truly shine as the seasons change. If you’ve been thinking about adding a tree to your yard, fall is one of the best times to plant. Cooler temperatures help trees establish strong roots before next year’s growing season, setting them up for long-term success.
Here are some outstanding maple varieties we love:

Autumn Blaze Maple
Our most popular and fastest-growing maple! The Autumn Blaze combines the best traits of red and silver maples, offering vivid scarlet fall color and rapid growth. It’s a great choice if you want a big impact in your landscape quickly.

Royal Red Maple
Looking for something truly unique? The Royal Red maple boasts dark wine-red leaves all season long, not just in autumn. Its bold, dramatic foliage stands out in any landscape and adds color from spring through fall.

Sugar Maple
A true native to our region, the Sugar Maple is known for its brilliant bright orange fall color. It’s also one of the best shade trees for summer comfort, with a strong branching structure and long life span.

Brandywine Maple
Not every yard has room for a towering tree, which makes the Brandywine maple a wonderful option. This compact, seedless variety matures at 25’ tall by 12’ wide—perfect for smaller yards, front gardens, or tight spaces. Its rich red fall color makes a dramatic seasonal statement.
Planting Maples for Success
When you bring home a maple, you’re investing in beauty that will last for generations. To give your new tree the best start:
Choose the right spot. Maples thrive in full sun and prefer well-drained soil. Think about how large your tree will grow at maturity.
Water deeply. Newly planted trees need consistent watering for their first couple of seasons. A slow, deep soak encourages strong root growth.
Protect your investment. Tree guards protect young trunks from critters, while watering bags ensure the right amount of moisture without the hassle.
We know planting a tree can feel like a big task, but you don’t have to do it alone!
Our garden center offers delivery and professional planting services to take the guesswork out of getting your new maple established. Plus, we carry watering bags, tree guards, mulch, and more—everything you need for a healthy, happy tree.
Make Your Landscape Glow This Fall!
Whether you’re looking for a native classic, a fast grower, a compact option, or a bold year-round standout, we have the perfect maple waiting for you. Visit us today—our expert crew is ready to help you choose, deliver, and plant your new maple so you can enjoy its beauty for decades to come.

Preserving Herbs & Vegetables at the End of the Season

As summer winds down, your garden is likely bursting with herbs and vegetables that you’ve nurtured all season long. The end of the season is the perfect time to preserve that hard work—so you can enjoy the flavors of your garden well into winter. Here are some practical steps for saving your harvest.
1. Drying Herbs
Herbs like basil, oregano, thyme, sage, and mint can be easily dried to store for months.
Air drying: Gather small bunches, tie the stems together, and hang them upside down in a warm, well-ventilated space out of direct sunlight.
Oven drying: Spread herbs on a baking sheet and heat at the lowest setting until completely dry.
Tip: Store dried herbs in airtight jars away from heat and light to preserve their flavor.
2. Freezing Vegetables
Some vegetables keep their flavor and nutrients better when frozen rather than canned.
Best candidates: Beans, peas, broccoli, bell peppers, and sweet corn.
Blanch first: Briefly boil vegetables, then plunge them into ice water to stop the cooking process before freezing.
Packaging: Store in freezer-safe bags, removing as much air as possible to prevent freezer burn.
3. Canning for Shelf Storage
Canning is ideal for tomatoes, pickles, jams, and relishes.
Water bath canning: Best for high-acid foods like tomatoes and fruit preserves.
Pressure canning: Required for low-acid vegetables such as carrots, green beans, and potatoes.
Safety tip: Always follow trusted canning guidelines to prevent spoilage.
4. Pickling for Tangy Treats
Cucumbers, beets, carrots, and even green beans make excellent pickles.
Combine vinegar, water, salt, and spices for your brine.
Store in the refrigerator for quick pickles, or process in jars for long-term storage.
5. Making Herb Butters & Oils
Fresh herbs can also be blended with softened butter or oil for flavorful additions to winter cooking.
Freeze herb butters in small portions for quick use.
Store herb-infused oils in the refrigerator and use within a week for safety.
Your Garden’s Flavor—All Year Long
Whether you’re drying basil, freezing beans, or making jars of tangy pickles, preserving your harvest is a rewarding way to savor the taste of summer.
We have educational books, composting bins, gloves, harvesting tools, and more to make your end-of-season gardening and preserving easy and enjoyable. Stop by and stock up before the frost!

Keep Your Garden Glowing: How to Spot & Stop Common Plant Ailments

When the weather is warm and humid—or bouncing between dry and damp—your plants can feel a little under the weather too. Just like us, they’re susceptible to sickness, and the garden “germs” they catch are often fungal diseases.
Don’t panic! The good news is that with a little know-how and the right products, you can treat many of these issues before they become a bigger garden disaster. Let’s break down the usual suspects and what you can do to stop them in their tracks:
Powdery Mildew
Looks like: A white, powdery coating on leaves, stems, or buds—almost like your plant got dusted with flour.
Loves: Warm, dry days followed by cool, humid nights.
Treatment:
Copper Fungicide – Great for prevention and early treatment.
Fung-onil – An effective fungicide that coats and protects foliage.
Pro tip: Improve air circulation by trimming dense foliage and avoid overhead watering.
Black Spot
Looks like: Dark, circular spots on leaves that turn yellow and drop prematurely—especially common on roses.
Loves: Wet, humid weather.
Treatment:
Fung-onil – A ready-to-use spray that helps fight and prevent future outbreaks.
Systemic Infuse – Absorbed by the plant to offer long-lasting protection.
Pro tip: Water at the base of the plant and clean up fallen leaves to prevent reinfection.
Rust
Looks like: Small orange, yellow, or reddish spots—almost like your plant is going for a fall look in summer.
Loves: Moist conditions and crowded plants with poor airflow.
Treatment:
Fung-onil– Spray thoroughly at the first sign.
Systemic Infuse – Protects from the inside out and keeps the rust from spreading.
Pro tip: Space your plants properly and prune to promote airflow.
Wilt
Looks like: Droopy, lifeless plants even when the soil is moist. Leaves may yellow or brown from the bottom up.
Loves: Stressful conditions like overwatering, underwatering, or extreme temps.
Treatment:
Fung-onil – Helps manage fungal wilts like Fusarium or Verticillium.
Systemic Infuse – Boosts the plant’s defenses over time.
Pro tip: Rotate crops in veggie gardens and improve soil drainage.
Why Weather Matters
This summer's flip-flopping between hot sun and surprise downpours creates the perfect storm for fungal issues. High humidity + moisture on leaves = a fungal fiesta. Keep an eye out when the weather turns soggy or steamy—it’s your cue to inspect your plants and take action early!
We've Got What You Need
Stop by the Garden Center and our knowledgeable staff will help you pick the perfect product for your plant problems—plus give you tips on how to prevent them in the future. Whether you prefer organic solutions or want something with staying power, we’ve got you (and your plants) covered.
Let’s keep those leaves lush, green, and fungus-free! 💪🌱

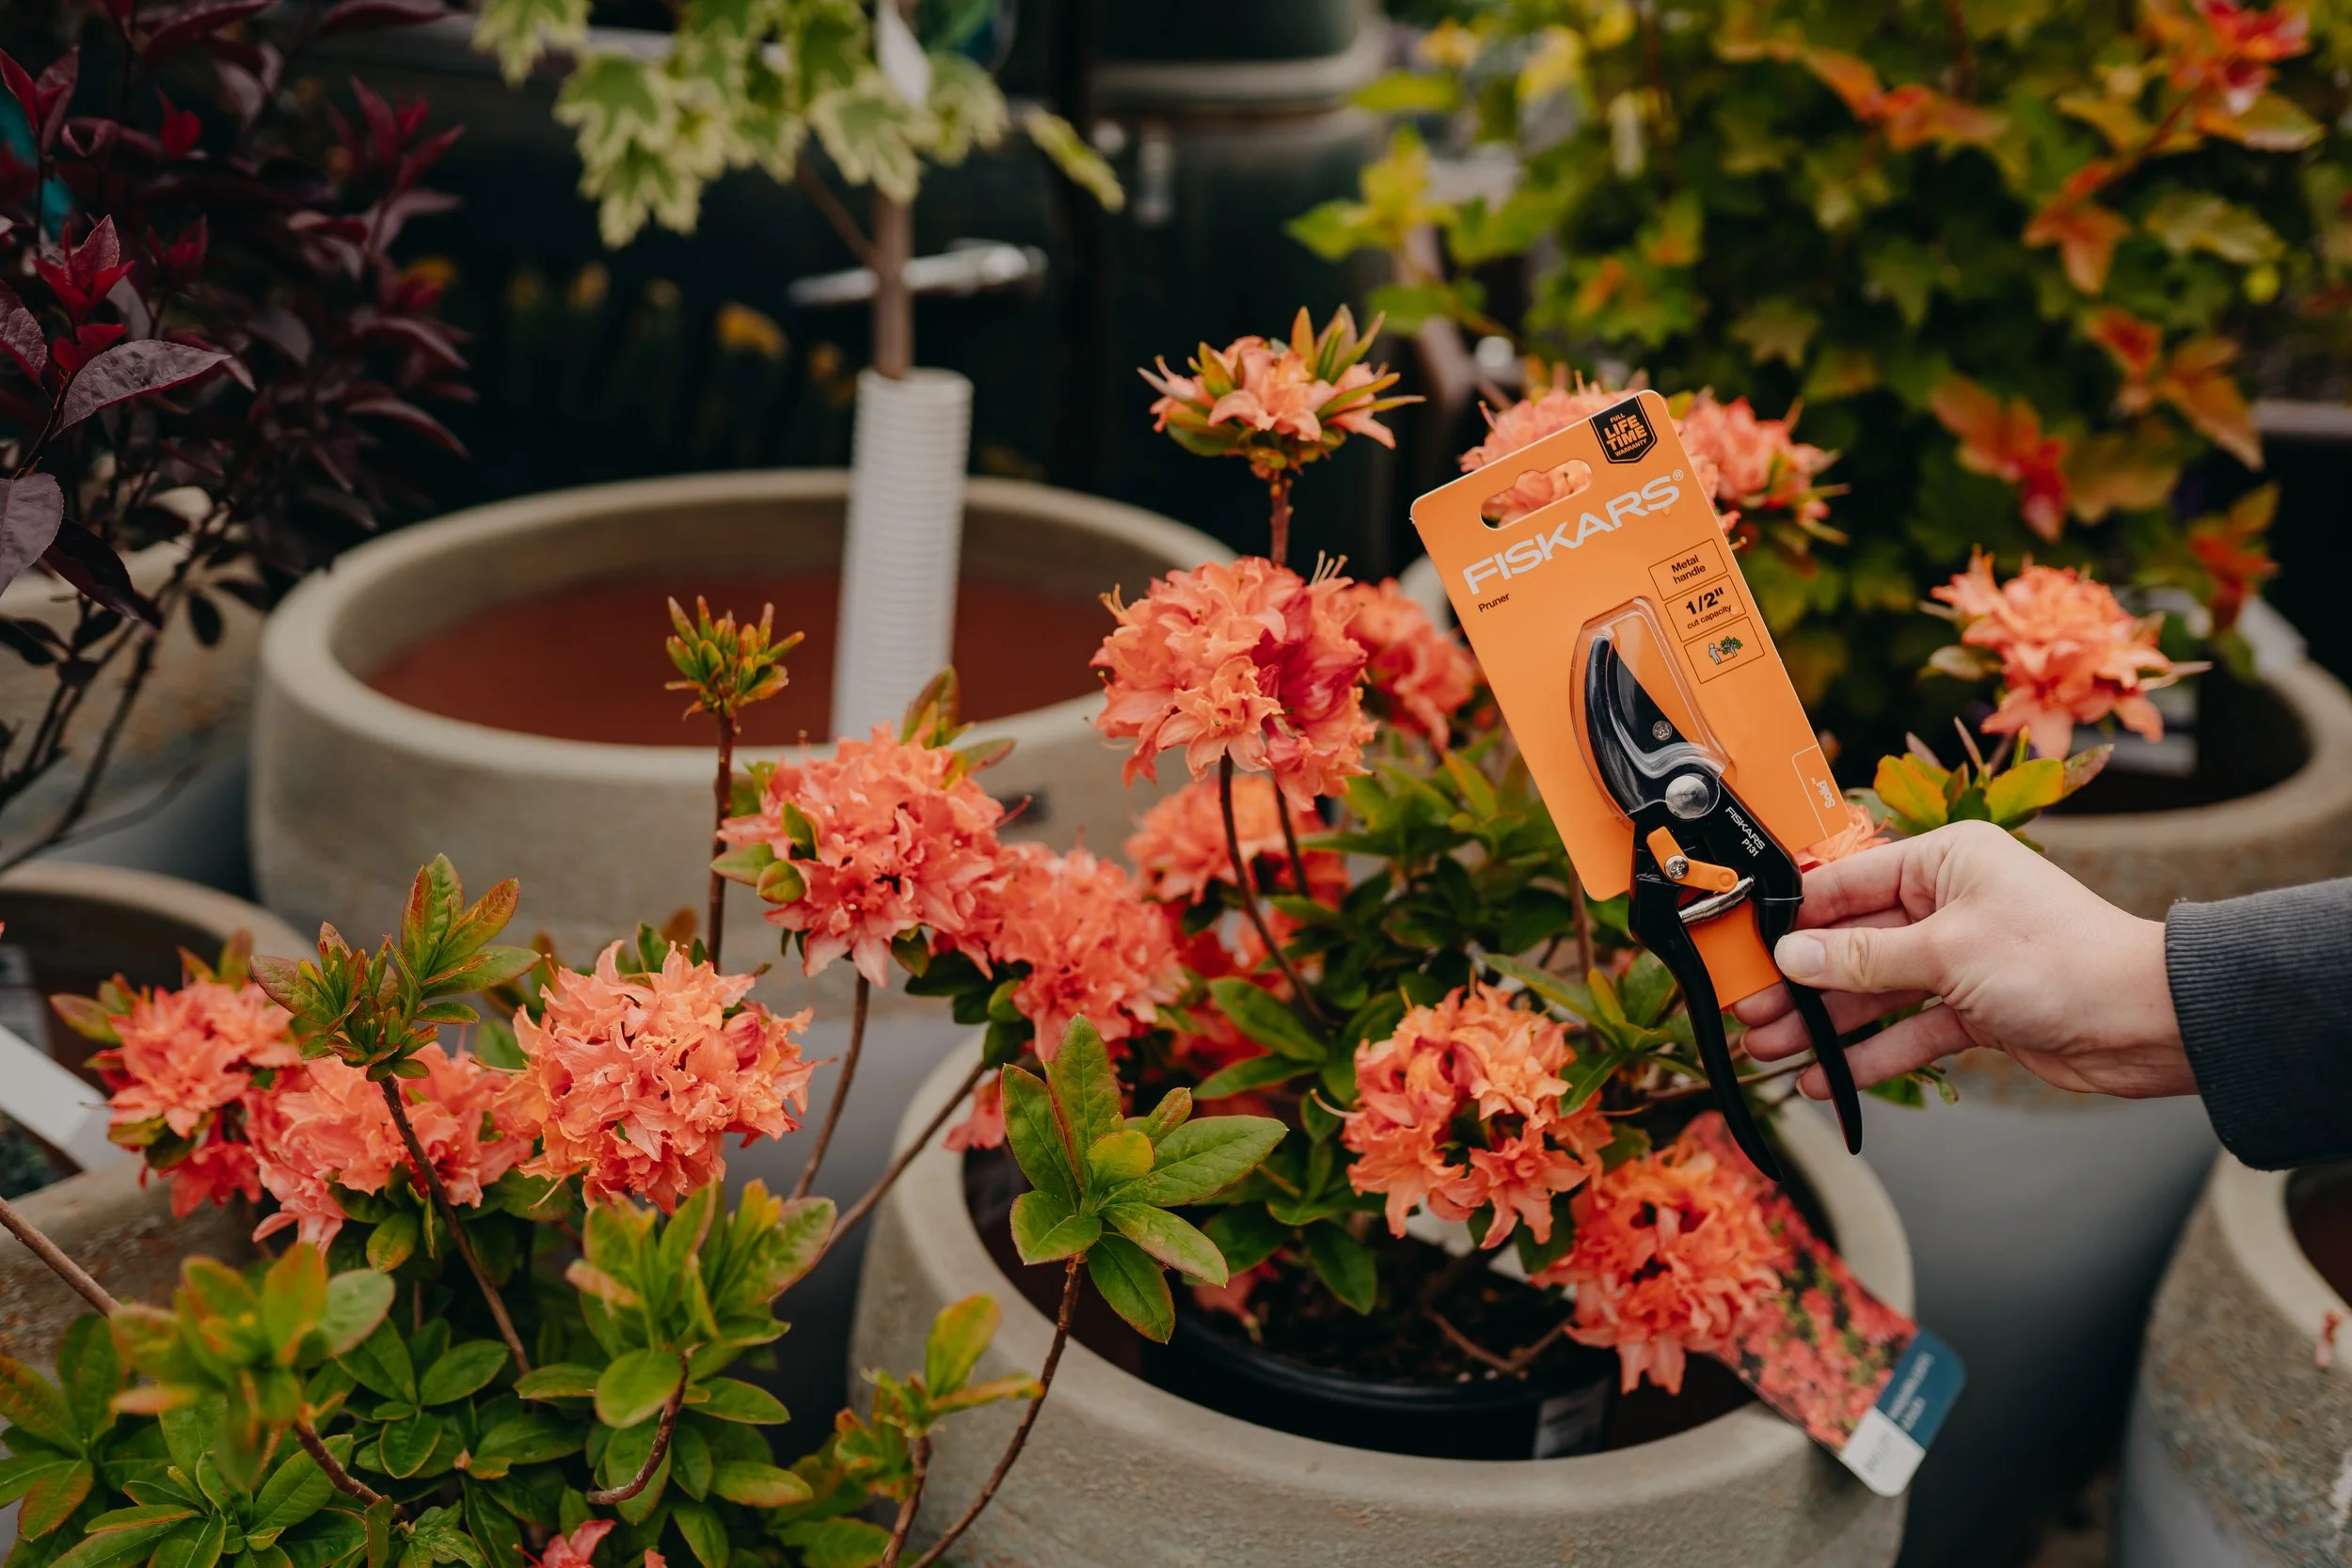
How (and When!) to Prune Your Evergreens

Evergreens are the reliable backbone of the garden—green through winter, low-maintenance, and always looking good. But even the most easygoing evergreens need a little trimming from time to time! Whether you’ve got boxwoods, yews, arborvitae, or spruce, a little pruning can help keep them healthy, shapely, and thriving.
Here’s everything you need to know to prune with confidence:
Why Prune Evergreens?
Shape it up: Keep shrubs looking tidy, symmetrical, or topiary-level fabulous.
Encourage healthy growth: Remove dead or damaged branches to keep plants strong.
Manage size: Prevent shrubs from outgrowing their space (or eating your walkway!).
Boost air circulation: Less crowding = less risk of pests or disease.
When Should You Prune?
Early August is the best time for most evergreens—after new growth is hardened and after the heat of the summer.
Avoid fall pruning! Fresh cuts can stimulate new growth, which might not harden off before winter.
Light touch-ups (like removing a stray branch) can be done almost anytime.
Tips by Type
Needle-Type Evergreens (like Pine, Spruce, Fir):
Only prune new growth (the soft, light green tips—aka "candles").
Don’t cut back into old wood—these won’t regrow.
Arborvitae, Yews, and Boxwood:
These tolerate heavier pruning and can be shaped more easily.
Avoid cutting too far into the brown, leafless interior—new growth won’t fill in.
Junipers:
Prune selectively—like arborvitae, they won’t grow back from old wood.
Focus on shaping and thinning, not deep cutting.
The Right Tools Make All the Difference
Good tools = clean cuts and happy plants. We carry sharp, quality pruners, loppers, and shears perfect for evergreen maintenance. Not sure what you need? Come in and chat with our team—we’ll help you find the right tool for your plant and your hand.
Pro Tips from the Professionals:
Always clean your pruners before and after use (hello, rubbing alcohol!)
Stand back often to check the shape as you go—less is more!
Don’t worry about perfection—plants are forgiving, and you’ll learn as you go.
When in doubt… ask us! Bring a photo, branch sample, or your pruning questions—we’re always happy to help.
Let’s Get Snipping!
Whether you’re refining a formal hedge or just giving your juniper a summer refresh, pruning your evergreens is a great way to stay connected to your garden. Stop by the garden center for tools, tips, and advice—we’ll get you growing with confidence!

Keep Your Pots & Hanging Baskets Looking Fresh All Season

We’ve all been there: you kick off the season with gorgeous, full pots and hanging baskets—lush, blooming, picture-perfect. But by mid-summer? They’re looking a little… meh. Don’t worry! With a few simple tips and the right products, you can keep those containers looking just as fresh in August as they did in May.
Here’s how to keep the bloom show going strong all season long:
The Power of Fertilizer
Your plants are hungry—and water alone won’t cut it. Think of fertilizer as their multivitamin. Container plants use up nutrients quickly, especially when they’re blooming like crazy. Without regular feeding, your plants will stall out, slow down, and stop blooming.
Two of our favorites here at the garden center:

Jack’s Bloom Booster (10-30-20)
This is a high-phosphorus fertilizer that encourages tons of blooms and healthy root development. Use it every 1–2 weeks for a quick boost of color and growth, especially during peak summer when your plants need a little extra love.

Proven Winners Water Soluble Fertilizer
Formulated specifically for flowering annuals, this one gives your containers a steady dose of all the good stuff they need to keep producing blooms nonstop. It’s gentle enough for regular feeding and keeps your plants looking like new.
Pro tip: Water your plants first before feeding if the soil is dry. This helps avoid fertilizer burn and makes sure nutrients get absorbed properly.
Why Deadheading Matters
Deadheading might sound like a metal band, but it’s actually one of the best things you can do for your containers.
Removing spent blooms encourages new ones to grow.
When you leave dead flowers on the plant, it thinks its job is done—it’s time to make seeds. But when you snip those off, the plant shifts energy back into making more flowers instead of wrapping things up for the season.
A few quick tips:
Use snips or pinch with your fingers just above a set of healthy leaves.
Some modern varieties (like many Proven Winners) are “self-cleaning,” but even they benefit from a little tidy-up now and then.
While you’re at it, remove yellowing leaves and straggly stems to keep the whole container or basket looking full and healthy.
Don’t Forget the Water!
Ok, we know this one’s obvious—but consistent watering is key to keeping baskets and pots thriving. In hot weather, containers may need water daily (or even twice a day for small baskets). A moisture meter or simply poking your finger an inch into the soil can help you tell if it’s time to water.
Bonus tip: Water deeply until it runs out the bottom to ensure roots are getting the moisture they need. Shallow sips = shallow roots!
The Formula for Success
Here’s the easy container care formula we swear by:
Water regularly + Fertilize weekly + Deadhead as needed = Happy, blooming plants all summer long!
Come See Us!
Need help choosing the right fertilizer, want tips for reviving a tired basket, or just need some new plant to freshen up your porch pots? Swing by the garden center—our team is always happy to help you troubleshoot or stock up on supplies. We’ve got Jack’s, Proven Winners, tools, watering cans, and all the good stuff to keep your containers thriving.
Let’s keep those pots and baskets poppin’ all season long!

How to Protect Your Garden from Deer & Rabbits (Without Losing Your Mind!)

If you've ever walked out to admire your garden only to find your tulips munched to nubs or your hostas turned into salad, you're not alone. Here in Wisconsin, rabbits and deer can be the most persistent (and frustrating!) garden visitors. But don’t worry — we’ve got your back and your backyard covered.
Let’s break down some of the best products we offer to keep those furry freeloaders at bay, plus some plant picks that naturally hold their own.
Your Garden Armor: Products We Trust
Plantskydd
This long-lasting, rain-resistant repellent is a gardener favorite. Made from dried blood (don’t worry — it’s organic and safe for pets!), it smells awful to deer and rabbits but is completely harmless to plants, people, and pollinators. Bonus: one application can last weeks!
Repels-All Granules
This stuff means business — combining garlic, dried blood, and other smelly ingredients into an easy-to-apply granule. It creates a scent barrier around your plants that animals just don't want to cross. Just shake it around the perimeter and let it do the work.
Liquid Fence (Ready-to-Use Spray)
Perfect for quick touch-ups or smaller garden beds! Spray directly on plants (especially new growth) and reapply after rain. Pro tip: apply in the evening when browsing pests are most active.
Repellex Granules
Targeted protection in tidy granule form. It soaks into the root zone and makes your plants taste bad from the inside out. Deer and rabbits will take one bite and move on — no second chances here.
Plant Smart: Deer & Rabbit Resistant Picks for Wisconsin
While no plant is completely safe from a very hungry deer or rabbit, these varieties tend to be lower on the menu in our region:
Millenium Onion
Russian Sage
Coneflower (Echinacea)
Black-Eyed Susan (Rudbeckia)
Lamb’s Ear
Ornamental Grasses
Bleeding Heart
Yarrow
Salvia
Lavender
We have many of these in stock throughout the season, and our team is happy to help you build a garden that’s beautiful and bite-proof.
Final Thoughts
Rabbits and deer are just part of the landscape here in Wisconsin — but they don’t have to ruin yours. With the right tools and a few savvy plant choices, you can outsmart them and keep your garden looking its best all season long.
Stop by and we’ll help you create a custom defense plan (and maybe share a few stories about our own battles with the backyard buffet line 😉).

Beetle Battle: How to Win the War on Japanese Beetles

Japanese beetles may be small, but they can cause big problems in your garden. These shiny green and bronze pests feed on over 300 types of plants, leaving behind skeletonized leaves and weakened plants. If you've seen them around your yard, you're not alone—early to mid-summer is peak season for Japanese beetle activity. But don’t worry! We’ve got the tools and tips you need to take control.
🪲 What Are Japanese Beetles?
Japanese beetles are invasive insects that typically emerge in late June and remain active through August. Adult beetles feed on foliage, flowers, and fruits, while their larvae (grubs) live in the soil and feed on grass roots, damaging lawns.
Signs of Japanese Beetle Damage:
Skeletonized leaves (only the veins remain)
Clusters of beetles feeding on flowers or fruit
Browning patches on your lawn due to grub activity
How to Fight Back: Products That Work
We carry a variety of effective solutions to help you manage beetles this season:
Bonide Japanese Beetle Killer (Ready-to-Use Spray)
Fast-acting and convenient, this spray helps knock down adult beetles on contact. It's ideal for use on roses, grapes, fruit trees, flowers, and shrubs.
Bonide Japanese Beetle Traps
Lure beetles away from your plants with these highly effective traps. Place them away from your garden to draw beetles to the trap instead of your plants.
Replacement Lures & Bags
Already using traps? Stock up on replacement lures and collection bags to keep them working all season long.
💡Pro Tips for Maximum Effectiveness
Time your treatments: Spray beetles early in the morning or late in the evening when they're most active and less likely to fly away.
Use traps strategically: Place traps far away from the plants you’re trying to protect. Traps attract beetles, so you want to lure them away—not draw them in!
Treat grubs in the soil: Late summer to early fall is the best time to apply grub control products if you’ve had beetle issues—this helps reduce next year’s population.
Stop In & Stock Up
We’re fully stocked with everything you need to fight Japanese beetles this season, including:
Ready-to-use sprays
Traps
Replacement lures and bags
And more trusted solutions!
Don’t let these garden pests take over—visit us today and get ahead of the beetle battle. Your plants will thank you!

Using Fresh Herbs in the Kitchen

Have fresh herbs growing in your garden or sitting on your kitchen counter? Don’t let them go to waste—learn how to make the most of their flavor and freshness with these practical tips for cooking with herbs.
🌿 Tips for Using Fresh Herbs in the Kitchen
Know When to Add Them
Delicate herbs (like basil, parsley, chives, cilantro, and dill) should be added at the end of cooking or used raw to preserve their flavor.
Hardier herbs (like rosemary, thyme, oregano, and sage) can handle longer cooking times and are great early in the cooking process.
Wash and Dry Properly
Rinse herbs gently in cold water and pat dry with a paper towel or use a salad spinner. Excess moisture can lead to soggy, spoiled herbs and dilute flavors in cooking.
Store Them Right
Soft herbs (parsley, cilantro, mint) do well in a jar of water in the fridge, loosely covered with a plastic bag.
Hard herbs (rosemary, thyme) can be wrapped in damp paper towels and stored in a sealed bag in the fridge.
Use the Stems Wisely
For herbs like parsley or cilantro, tender stems can be chopped and used just like the leaves.
Woody stems from rosemary or thyme can be used to infuse stocks or sauces, then removed before serving.
Chop Just Before Use
Herbs start to lose their flavor and aroma quickly after cutting. Chop them right before adding to your dish for maximum impact.
Don’t Overdo It
Fresh herbs are potent. Start with a small amount and add more as needed. It’s easier to add than to fix over-seasoning.
Make Compound Butters or Oils
Mix chopped herbs with softened butter or oil for an easy flavor booster for meats, veggies, or bread.
Dry or Freeze Extras
If you have leftover herbs, dry them by hanging in small bundles or freeze them in olive oil in ice cube trays for later use.
Match Herbs to Cuisine
Basil, oregano, and rosemary work well with Italian dishes.
Cilantro, mint, and lemongrass pair beautifully with Asian or Latin American flavors.
Dill and parsley shine in Eastern European or Mediterranean cuisine.
Experiment With Fresh Herb Garnishes
A sprinkle of fresh herbs can brighten up the look and taste of a dish—think parsley on soup or mint on fruit.
Fresh herbs are a simple way to bring life to your cooking—so don’t let them go to waste! With a little care and creativity, you can turn even everyday meals into something special. Looking to start growing your own herbs? Stop by Down to Earth to find our in-stock herbs!

Perennials Pollinators Love! 🐝🌸

Pollinator Week is one of our favorite times of the season! Not only is it a chance to celebrate the hardworking bees, butterflies, hummingbirds, and other beneficial creatures in our gardens — it's also the perfect time to plant with a purpose.
Pollinators are essential to healthy gardens, vibrant ecosystems, and even the food we eat. In fact, over 75% of flowering plants and about 35% of our crops depend on pollinators to grow and reproduce. That means every time you plant something pollinator-friendly, you’re helping ensure a thriving, colorful, and more sustainable world.
Why Perennials for Pollinators?
Perennials are a fantastic way to support pollinators in your garden year after year. They come back stronger each season, provide long-lasting blooms, and many are specifically adapted to attract and nourish our pollinating friends. Plus, they offer a beautiful backbone for your garden’s design.
Here are some pollinator-loved perennials that thrive in Wisconsin:
🌿 Coneflower (Echinacea)
Why pollinators love it: Bold, nectar-rich blooms that last from mid-summer to fall.
Bonus: Birds love the seed heads in winter, so skip the deadheading!
🌿 Bee Balm (Monarda)
Why pollinators love it: Bees, butterflies, and hummingbirds can’t resist the colorful, spiky flowers.
Bonus: It’s deer-resistant and smells amazing.
🌿 Black-Eyed Susan (Rudbeckia)
Why pollinators love it: This cheerful classic is a butterfly magnet.
Bonus: Very low maintenance and drought-tolerant once established.
🌿 Milkweed (Asclepias)
Why pollinators love it: It's the host plant for monarch butterflies.
Bonus: Gorgeous clusters of flowers and a key player in butterfly conservation.
🌿 Russian Sage (Perovskia atriplicifolia)
Why pollinators love it: Loads of tiny purple blooms packed with nectar.
Bonus: Silver foliage adds texture and it thrives in sunny spots.
🌿 Joe Pye Weed (Eupatorium)
Why pollinators love it: Bees and butterflies flock to its massive pink blooms.
Bonus: Adds height and drama to rain gardens or wildflower beds.
🌿 Blazing Star (Liatris)
Why pollinators love it: Its upright purple blooms are a butterfly buffet.
Bonus: Great cut flower and easy to grow in sunny beds.
Tips to Make Your Garden a Pollinator Paradise:
Plant in groups for better visibility and access.
Aim for blooms spring through fall to support pollinators all season.
Skip the pesticides. Even natural ones can harm pollinators.
Add water! A shallow dish with pebbles gives them a place to rest and rehydrate.
Let’s Grow a Better World Together
We’re stocked with native and pollinator-friendly perennials, ready to plant now! Stop by during Pollinator Week and discover plants that not only beautify your yard, but also help our ecosystem thrive. Whether you’re building a new butterfly garden or just want to tuck a few bee favorites into your beds, we’re here to help.
🌼 Plant for pollinators. Plant for beauty. Plant for tomorrow. 🌼
Pruning Tips for Rhododendrons, Lilacs & Azaleas

Pruning can feel a little intimidating, especially when you're dealing with flowering shrubs like rhododendrons, lilacs, and azaleas. But don’t worry — a little know-how goes a long way! The key is knowing when to prune and how to do it without cutting off next year’s flowers. Here’s your guide to getting it just right.
Why Prune These Shrubs?
Pruning keeps your shrubs healthy, encourages better air flow, prevents them from getting leggy or overgrown, and — most importantly — boosts beautiful blooms year after year.
General Rule of Thumb
Prune spring-blooming shrubs right after they flower.
That’s because these shrubs set next year’s buds shortly after blooming. If you wait too long, you risk cutting off next year’s flowers.
Rhododendrons
When to prune:
Late spring to early summer, right after blooming.
How to prune:
Remove spent blooms by gently snapping them off just above the leaves (called deadheading).
Cut back any dead, damaged, or crossing branches to the base or a healthy bud.
For reshaping, prune lightly — rhododendrons don’t respond well to severe cutting.
To rejuvenate an old, overgrown shrub, you can gradually reduce its size over 2–3 seasons.
Pro tip: Avoid cutting into old wood that has no leaves — it may not regrow.
Lilacs
When to prune:
Right after the blooms fade — usually late spring to early summer.
How to prune:
Remove spent flower heads to prevent seed formation and encourage new growth.
Thin out about 1/3 of the oldest stems at the base each year to promote air flow and strong new canes.
Remove any suckers (shoots that pop up from the base) unless you want the shrub to spread.
Pro tip: Regular thinning keeps lilacs from getting woody and improves bloom quality.
Azaleas
When to prune:
Shortly after blooming ends, typically late spring.
How to prune:
Lightly shape or reduce size by cutting back just above a set of leaves.
Remove dead or straggly stems, especially from the center of the plant.
Don’t prune past mid-summer — they begin setting buds for the next year around July.
Pro tip: Azaleas can handle light pruning annually. If yours is overgrown, rejuvenate gradually to avoid shocking the plant.
Pruning Tips & Tools
Use clean, sharp pruners to make precise cuts.
Always cut just above a leaf node or branch junction.
Remove dead or diseased wood first to assess the overall shape.
Final Thought
Pruning isn't just about shaping — it’s about setting your shrubs up for success next season. If you're unsure where to start, bring a photo or branch to Down to Earth and we’ll help you make a plan. With a little timing and care, your rhododendrons, lilacs, and azaleas will reward you with healthier growth and more flowers next year!

How to Care for Your Hanging Baskets All Season Long

Hanging baskets are one of the easiest ways to add instant color and charm to your porch, deck, or patio. But unlike garden beds, these vibrant beauties rely on you for all their care needs — and they’ll let you know fast if something’s not right! Whether you're a first-time basket owner or a seasoned gardener looking for a refresher, here are our top tips to keep your hanging baskets thriving all season long — even while you're away.
🌞 Sun or Shade? Know Your Basket’s Light Needs
One of the most important things you can do is match your hanging basket to the light conditions in your space. Not all baskets are created equal! Before you buy (or if you're not sure), check the plant tag or ask one of our garden center experts about how much sunlight your basket needs.
Full Sun (6+ hours) – Think petunias, calibrachoa, verbena, and geraniums.
Part Sun/Part Shade (3–6 hours) – Lobelia, fuchsia, impatiens, and coleus can handle a bit of both.
Full Shade (less than 3 hours) – Look for baskets filled with begonias, ferns, or torenia.
Tip: Pay attention throughout the day to how the sun moves across your porch or yard. Morning sun is gentler, while afternoon sun can be harsh and drying.
💧 Watering: When and How Much?
Hanging baskets dry out much faster than in-ground plants because they’re exposed on all sides — especially on hot, windy days. Most baskets need daily watering, and sometimes twice a day in mid-summer. Here's what to watch for:
Check soil moisture: Stick your finger into the soil up to the first knuckle. If it feels dry, it's time to water.
Water thoroughly: Keep watering until you see it drain from the bottom. This ensures the entire root ball is hydrated.
Morning is best: Watering early helps the plant stay cool during the heat of the day and reduces the chance of fungal issues.
Tip: If your basket starts to wilt daily despite watering, it may have outgrown its container. Consider repotting into a larger basket or trimming back some growth.
✈️ Headed on Vacation? Here's What to Do
We get it — summer is for travel! But while you’re away, your baskets still need care. Here are a few options:
Ask a neighbor or friend: Leave clear instructions and a watering can nearby.
Use a self-watering system: There are many clever products on the market, from water globes to products such as Soil Moist that help with water retention.
Move them to a cooler, shadier spot: Even sun-loving baskets will be better off out of harsh sunlight if no one is watering them daily for a short period or time.
Soak them before you go: Give your baskets a deep soak the night before you leave to help them hold on a bit longer.
🌿 Final Thoughts
A little extra care goes a long way with hanging baskets. With the right placement, consistent watering, and some vacation planning, you’ll enjoy lush, blooming color from spring into fall. If you're ever unsure what your basket needs, our garden center team is here to help you find the perfect plants and share expert advice on keeping them beautiful all season.
Happy hanging basket season!🌼